Begin by assessing your subterranean chamber’s acoustic profile. Bare concrete walls and floors can create unwanted echoes and reverberation. To mitigate this, incorporate substantial sound-absorbing materials like strategically placed acoustic panels, thick rugs, and heavy drapes. A combination of diffusion and absorption will yield the best results. For example, consider installing a custom-built diffusor on one wall and pairing it with broadband absorbers on the adjacent surfaces.
Illuminate your subterranean studio with layered light sources. Avoid harsh overhead fixtures that can cause glare. Instead, opt for a combination of ambient, task, and accent illumination. Think dimmable LED strip lighting for mood, adjustable spotlights for highlighting instruments, and focused desk lamps for mixing consoles. Precisely controlling the brightness and color temperature is key for extended creative sessions.
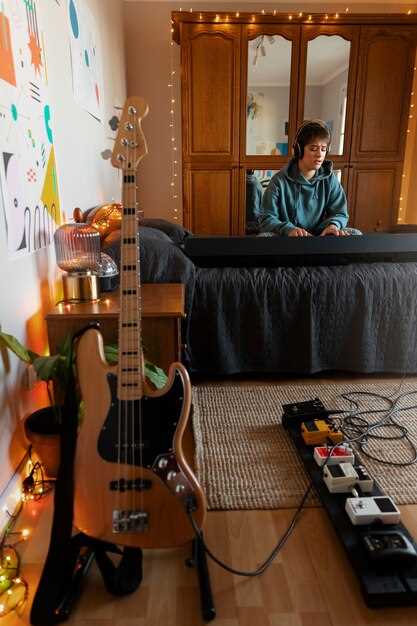
Optimize the layout for workflow and comfort. Arrange your gear strategically to minimize cable clutter and maximize accessibility. Consider incorporating modular furniture that can be easily reconfigured. For example, a mobile workstation on wheels allows for flexible positioning of synthesizers or recording equipment. Don’t forget ample storage for instruments, cables, and accessories; a well-organized space promotes creativity and efficiency.
Soundproofing Your Subterranean Studio: Practical Methods
To reduce sound transmission, begin by sealing all air gaps. Use acoustic caulk to fill cracks around pipes, wiring, and ductwork. This is more cost-effective than many perceive and offers immediate improvement.
Next, consider mass-loaded vinyl (MLV). Affix MLV directly to the joists before adding drywall. MLV boasts a density of roughly 1 lb per square foot, providing a considerable noise reduction coefficient.
Decoupling Techniques
To decouple walls, construct staggered-stud walls. Stagger studs so each wall surface has minimal contact, reducing vibration transfer. An air gap of at least 1 inch between studs is recommended. Alternatively, use resilient channels – metal strips attached to studs that drywall is screwed into. This creates separation, diminishing sound pathways.
For the ceiling, suspend it using isolation hangers. These specialized hangers attach to the floor joists above, creating a physical break, preventing structural sound from propagating upward. Ensure the chosen hangers are appropriately rated for the weight they will support.
Absorption Enhancement
Employ fiberglass insulation with a density of 3 lbs per cubic foot within the wall and ceiling cavities. High-density insulation absorbs sound waves, converting acoustic energy into heat. Consider adding acoustic panels to walls and ceiling for enhanced absorption of mid and high frequencies. A coverage of 20-30% of the surface area yields noticeable advantages.
Finally, implement a solid-core door with perimeter seals and a drop-down threshold. Hollow-core doors offer minimal sound isolation; upgrade to a dense, solid option. The seals ensure an airtight closure, preventing sound leakage. The drop-down threshold seals the gap beneath the door when it’s closed.
Optimizing Audio Quality: A Treatment Handbook
Strategically place acoustic panels at first reflection points – where sound waves bounce off surfaces before reaching the listener. Use a mirror; where you see a speaker reflected is a first reflection point.
Bass traps, typically triangular prisms placed in corners, absorb low-frequency sounds. Aim for at least two bass traps in opposing corners to manage standing waves – resonances that cause uneven frequency response.
Diffusers scatter sound waves, preventing echoes and creating a more spacious sonic environment. Use them on back walls or areas opposite reflective surfaces to broaden the perceived soundstage.
Absorption coefficients (sabins) quantify a material’s sound absorption. High sabin values (close to 1.0) denote greater absorption. Choose materials with appropriate sabin values based on the frequencies you intend to control. Consult product specification sheets.
Consider using heavy curtains or acoustic blankets to dampen sound reflections from windows or large, flat surfaces. Ensure the curtains are thick and cover the entire window area to maximize impact.
Floating floors or resilient channels can decouple the floor and ceiling from the building structure, minimizing sound transmission to adjacent areas. This is particularly relevant for impact sounds like footsteps.
When constructing sound-isolating walls, use dense materials such as mass-loaded vinyl (MLV) or multiple layers of drywall with a damping compound between layers. Seal all gaps and cracks to prevent sound leakage.
Calibration software, coupled with a measurement microphone, can analyze the frequency response of your space and suggest specific placement adjustments for treatment. Consider tools like Room EQ Wizard (REW) for this purpose.
The Noise Reduction Coefficient (NRC) indicates how much sound energy a material absorbs. A higher NRC value signifies better absorption. Select products with suitable NRC values to meet isolation goals.
Experiment with microphone placement and monitor positioning. Small adjustments can significantly impact the sound you hear. Aim for an equilateral triangle configuration between the speakers and the listening position.
Creating a Relaxing Vibe: Lighting & Decor Ideas
Opt for layered illumination. Begin with dimmable recessed fixtures emitting a warm (2700K-3000K) light temperature as your primary source. Supplement this with floor lamps featuring amber-toned shades for focused task illumination and accent lighting.
Incorporate salt lamps. The soft, diffused glow promotes calmness. Position one near your preferred listening spot for maximum effect.
Select sound-absorbing materials in calming colors. Drapes in muted blues or greens, thick area rugs with plush texture, and acoustic panels wrapped in linen fabrics can minimize echoes and create a serene sonic atmosphere.
Introduce natural elements. A small indoor fountain or a collection of air-purifying plants, such as snake plants or peace lilies, can enhance the tranquility of the recreational space.
Prioritize comfortable seating. Beanbag chairs, oversized floor cushions, or a plush sectional sofa upholstered in a soft, tactile fabric can contribute to relaxation. Aim for furniture with a low profile to create a sense of spaciousness.
Integrate aromatherapy. Diffuse calming essential oils, like lavender or chamomile, during listening periods. An ultrasonic diffuser with a built-in timer offers precise control and reduces visual clutter.
Curate a collection of tactile objects. Smooth river stones, wooden sculptures, or textured throws can provide a sensory connection to nature and encourage mindful engagement.
Hide unsightly cables. Use cable management sleeves or boxes to conceal wiring from equipment. This will create a more visually appealing environment and reduce distractions.
Avoid harsh fluorescent lighting. Replace these with warmer, adjustable LED options. Consider smart bulbs that allow you to control color temperature and brightness via a mobile app.
Personalize the space with meaningful artwork. Choose abstract prints or nature photography in calming color palettes. Avoid overly stimulating or busy patterns.
Q&A
My basement has low ceilings. Are music rooms really possible in such a space, or am I just dreaming? What can I do to make it feel less cramped?
Low ceilings present a challenge, but a basement music space is still achievable! Focus on visual tricks to create the illusion of height. Light paint colors on the walls and ceiling will help. Use vertical design elements, such as tall, narrow bookshelves or artwork, to draw the eye upward. Consider recessed lighting instead of hanging fixtures to maximize headroom. Mirrors are also beneficial for opening up the area and making it appear larger.
I’m worried about soundproofing my basement music space. My neighbors are close! What are some affordable ways to reduce the noise leaking out?
Soundproofing doesn’t have to break the bank. Start by addressing gaps around doors and windows with weather stripping or acoustic sealant. Heavy curtains or acoustic panels on the walls will absorb sound. Mass-loaded vinyl (MLV) is a great sound barrier, though may require professional installation. Even layering rugs over a thick underlayment can help dampen vibrations traveling through the floor. If your budget allows, consider upgrading the door to a solid-core model.
Humidity is a problem in my basement. How can I protect my instruments from damage while still creating a comfortable music room?
Controlling humidity is paramount for instrument preservation. A dehumidifier is a must-have in most basements. Invest in a quality hygrometer to monitor the humidity levels; aim for around 45-55%. Ensure proper ventilation to prevent moisture buildup. Store instruments in their cases when not in use, and consider using silica gel packets to absorb moisture within the cases. Also, avoid placing instruments directly against cold basement walls.
What type of flooring is best for a basement music room? I want something that sounds good, looks good, and can handle potential moisture.
For basement floors, moisture resistance is key. Avoid carpet directly on the concrete slab, as it can trap moisture and promote mold growth. Floating engineered wood floors or laminate floors are good choices, offering warmth and some sound absorption. Another option is rubber flooring or interlocking foam tiles, which are durable, easy to clean, and provide excellent sound dampening. Add area rugs over your flooring choice to reduce sound reflection and add some comfort.
Besides instruments, what other types of furniture and equipment are helpful to include in a basement music room to improve the functionality?
Beyond the obvious instruments, think about seating, storage, and acoustics. Comfortable seating is important for practice and collaboration. Add a sofa, chairs, or even beanbags. Storage solutions like shelving, cabinets, or instrument racks will keep your space organized. A good microphone, audio interface, and recording software are advantageous if you plan to record your music. Consider installing acoustic panels, bass traps, and diffusers to manage sound reflections and improve the overall sound in the room.